
“Plugged In Not Charging” Problem Solutions
Plugged in, Not Charging is a Windows Operating System issue and if you recently having this problem in your laptop then maybe it’s possible that your laptop is suffering from lack of charging and giving you some bad run-time Power Backup, and it’s all happen just because of some minor hardware or software fault, in the laptop of yours.Normally when this Error appears on your screen, then it also possible that you might not be able to seen any charging light on your laptop, or maybe the changing light is turned ON, but the adapter still not charging the laptop at all and just only showing you the frozen battery status like “0% available (Plugged In, Not Charging)” or some other froze percentage digit.
As I said, it’s totally a Hardware or Software related problem of your laptop and if you do suffering from this problem constantly, then now you really don’t have to worry about it because in this article, I’ve written all the explained Step by Step Troubleshoot Guide, which having almost all possible solutions what you try to fix this issue and sometimes, some users fix their PC in couple of minutes by just only trying the first solution.Actually, there are four different reasons for this error to shows up on this laptop’s screen and it’s really hard to say that, which one of them is creating the problem, and the only way to find the main reason is by troubleshooting the laptop completely.Here’s The List Of Four Main And Only Reasons, Why This Error Occurring In Your Laptop, And Those Are –
- Windows Problem.
- Power Adapter (Charger) Problem.
- Battery Problem.
- Laptop’s Internal Motherboard Problem.
So, let’s start to troubleshoot everything step by step and now you’ll just need to follow the whole repairing procedures given down below from step 1 to the last, until you fix your laptop.
In case, If the problem isn’t solved by this guide, then I will definitely give you a valid reason why this error is still stuck on your PC like, which hardware is causing this problem or what thing you should need to replace to fixing this thing.
1# – Troubleshoot Windows Problem
 Mostly you will be going to fix your laptop by just applying this first step of this troubleshooting Guide because 95% of this Error is commonly caused by due to the corrupted Power Adapter Drivers of your Laptop’s Windows OS, and that’s the reason why I wrote this fixing Driver part extra explained as compared to the others so, you can easily understand and will perform it well on your computer, and I hope you will quickly fix your problem.
The name of that corrupted driver what I’m talking about is “Microsoft ACPI-Compliant Control Method Battery” and actually this is the main root cause of this error to occur when every time you connects your laptop’s power adaptor.
ACPI stands for “Advanced Configuration and Power Interface” and the actual work of this ACPI drivers is to maintain your laptop’s charging services process, but sometimes when this driver got corrupted by some viruses or corrupted registry or maybe the 3rd party software installation, then it’s 100% possible that you might be seeing this plugged in and not charging problem on the battery icon on your Windows PC.
And to fix this issue, you’ll just need to remove this driver from your computer and by doing that, you can fix your problem instantly, and the best part is, after removing that driver you really don’t have to reinstall it back because your windows will do it automatically for you.
So, Let’s See How To Remove This Corrupted Drivers From Any laptop:
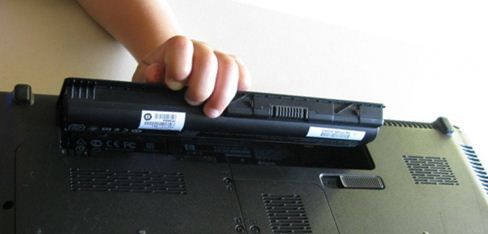
First, you’ll need to shut down your laptop if it’s running and when its got turned off, then you’ll have to put the laptop’s battery out from its back panel, and after that, I want you to start your laptop’s Windows by only using the power adapter cable, and off course yes, you can use you laptop without battery by only using the charger cable.
Actually, It’s really safe to run your laptop without the battery and in case, if your laptop didn’t get starts normally or having some problem to start without a battery, then it’s quite possible that your laptop’s power adapter might get faulty, and to check that, just move the “Troubleshoot Hardware Problem” Step down in this article where I wrote about ‘how to troubleshoot a power adapter completely’, or otherwise just continue.
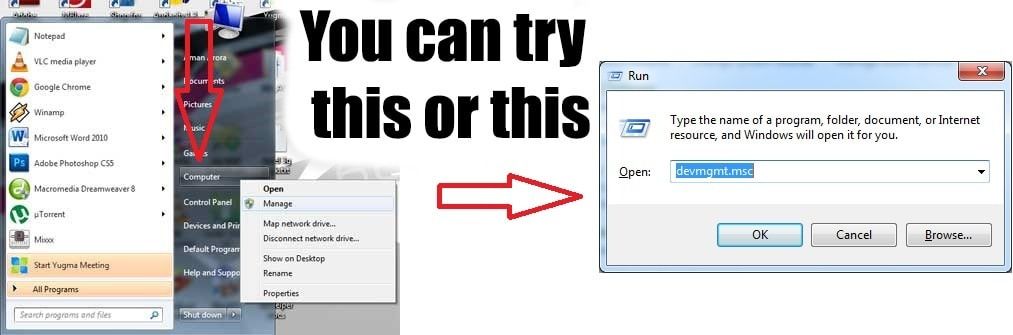
After when your laptop’s start completely, then now you’ll need to open your Windows Device Manager by typing the “devmgmt.msc” command in the Run Commander.
Or you can also open it by Right Clicking on the Computer tab in the Start Menu and then select “Manage” to open your Windows Device Manager in front of you, as just like shown in the picture given below.
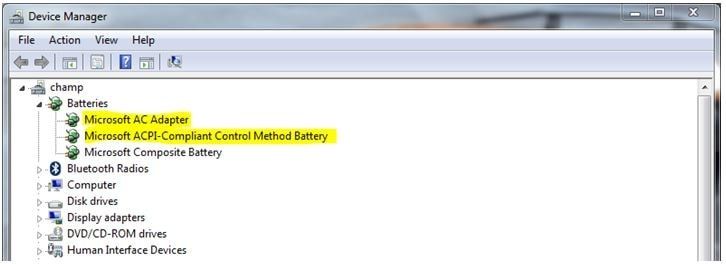
After that, you’ll need to expand the “Batteries” tab and then you’ll able to see the “Microsoft ACPI-Compliant Control Method Battery” drivers of your laptop.
As you can see in the example picture below, I’ve highlighted two different drivers, but you only need to remove the main one “Microsoft ACPI-Compliant…..” first, and if removing that ACPI driver doesn’t help, in that case, you’ll also have to remove the second one named“Microsoft AC Adapter” from the device manager. But make sure you only remove the second one when your problem isn’t solved by just removing the first recommended one.
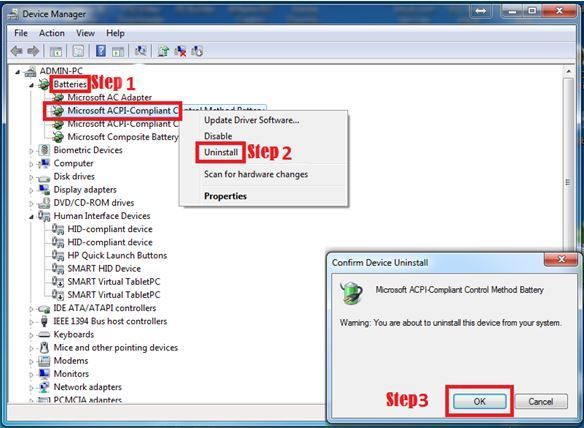
And to remove the drivers, you’ll need to select it first and then right click on it to unhide the extra options and after that, click on the “Uninstall” button and after when the “Confirm Device Uninstall” box appears, just click on “OK” to remove that driver completely out from your laptop.
 After when the drivers got removed, just shut down your laptop again and now put the battery back in its place and then again start your laptops and this time it’s possible that the problem is gone.
What To Do, If This Problem Still Stays, Or Come Back Within A Week Or Month?
In case, If your problem still isn’t fixed by the above first listed solution, then it’s quite possible that the registry database of your operating system got messed up pretty well bysome virus or a malware software.
And the only way to fix that, by using the best in class registry cleaner tool because there are more than 1 Million Registries listed in your Windows Registry Database and its actually really hard to find and fix that particular one, which is mainly creating this problem.
You can find more than 50 Registry Cleaner on the internet but those who actually works are only available in the paid version. So, before spending your money, I want you to reset your laptops BIOS first because most of the time that really helps a lot.
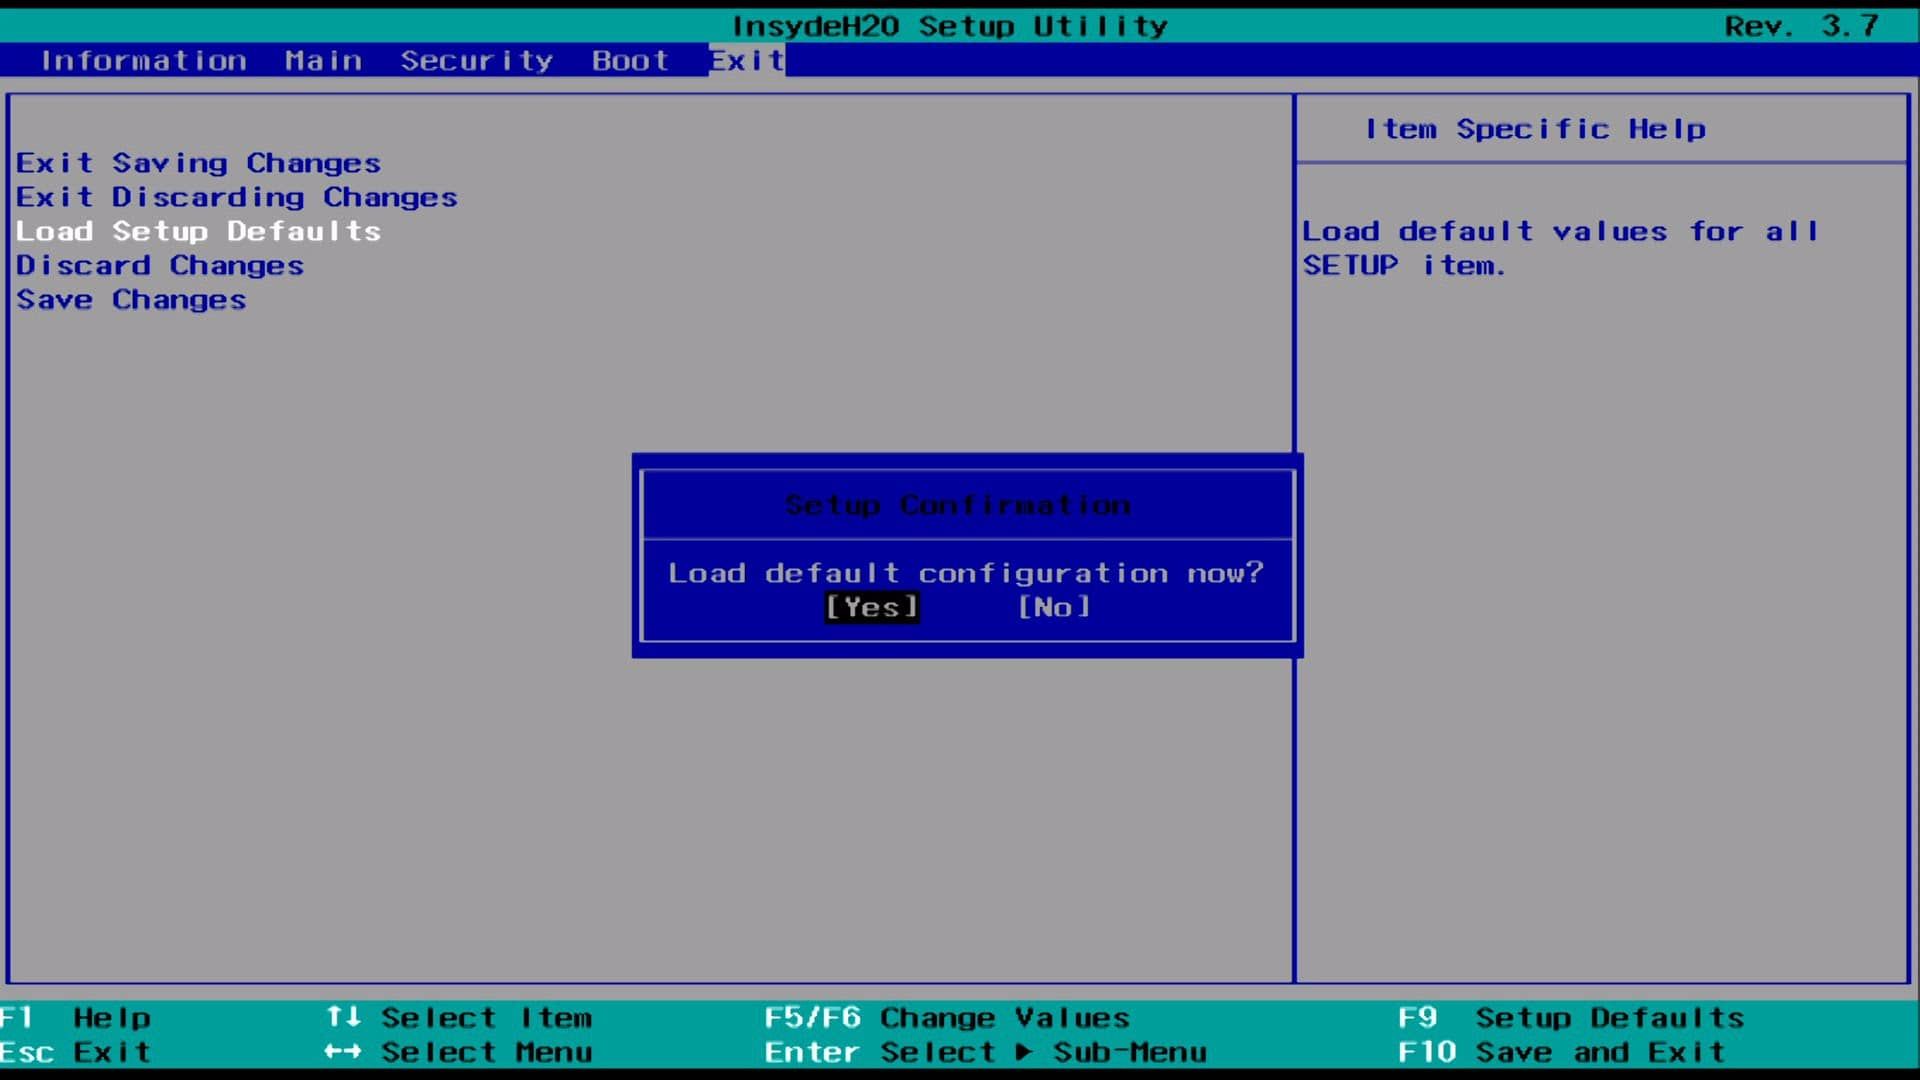
- To Reset your Laptop’s BIOS, first, you’ll need to open it by pressing the F2 key or Del key or maybe whatever the key your computer shows on the first black logo screen to get into the Bios Menu.
- After when you successfully get into the BIOS Menu, now you’ll need to find the reset option to load the default configuration and most of the times you can find that option in the “Exit” tab of your BIOS.
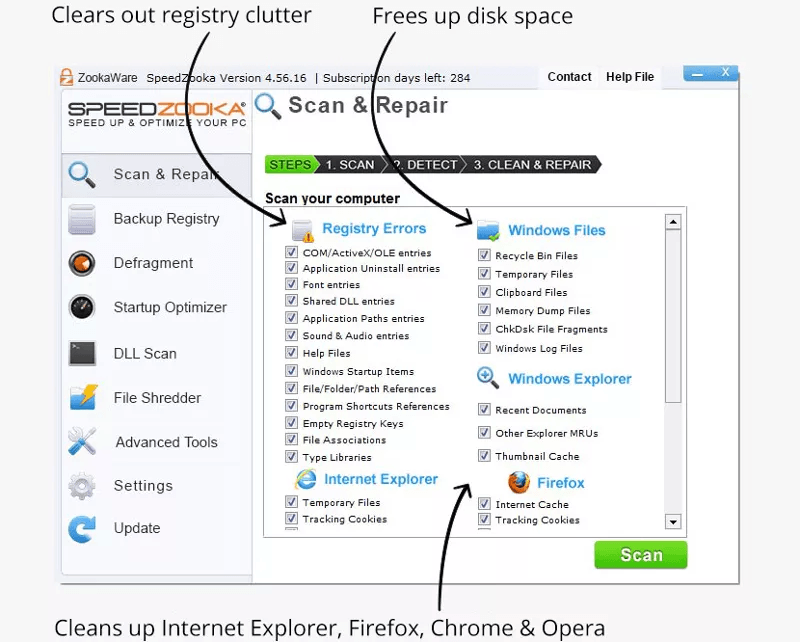
If Resetting BIOS won’t help you either, then maybe now it’s time you should need to try the Registry Cleaner in your Windows, and if you wanted my opinion, then the “Zookaware” and “CCleaner” are the two best in class Registry Cleaner Tools which can actually make thing back to normal.
Now it’s all on you select which one, but according to me the Zookware is quite worthy because it’s not just a simple registry cleaner like “CCleaner”, it can provide you more than 4 useful tools to optimize your laptop’s overall performance and not just that, this registry cleaner also comes with 60 Days Money Back Guaranty, which is actually quite good.
You Can Use These Links To Directly Go To The Download Page:
- 1st Best – Zookaware Cleaner
- 2nd Best – CCleaner Professional
#Troubleshoot Hardware Problem
Sometimes it’s possible that the problem isn’t get solved by the Operating System repairing thing and when the troubleshooting software side won’t get beneficial then it quite possible that the issue is coming from the faulty attached hardware of your laptop, its either can be your adapter or maybe battery. So, let’s check this out to find which one is creating this problem by following this 2nd Step of fixing “Plugged In Not Charging” problem guide.
Just like I said this problem can occur due to faulty charger or your battery, but most of the times charger is actually the one who is creating this whole problem and that’s the reasons why I want you to start the first hardware troubleshooting on your laptop’s charger adaptor.
Step 1 – Power Adapter Checkup: There are couple of things can be happen with your power adaptor to create this problem on your laptop like, lack of correct or steady Power Supply Output or maybe producing no Power Supply at all and to find is this really your charger’s fault, there are actually couple or more things what you still try to confirm that.
Here’s The List Of Things What You Can Try To Troubleshoot Your Power Adaptor:
- First, if you are using the same power socket for your laptop’s power adaptor then maybe it possible that the power supply coming from that socket isn’t coming enough to run a power adaptor and yes, it happen when the socket got broke from inside and having some loose connection.
- Or, if the socket is working well and you still having this problem on every power socket in your home or office, then you can also try to borrow some another same spec power adaptor from your friend or family and try to test your laptop with that.
- In case, if you can’t able to find some other same spec charger to test your laptop, then there is also an another great way to identify does your adapter is working fine or not. And to do that, we use a tool called “Multimeter” to clarify does your adapter is providing the right amont of current voltage to your laptop or it’s just working un-properly.
Here’s The Quick Guide To Help You Out With The Multimeter Testing Thing:
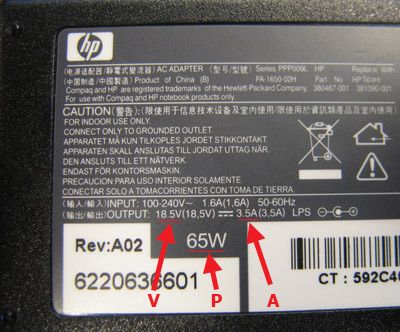
First, plug your Power Adapter into the main power socket and make sure everything is connected properly, and this time you don’t have to connect the charger to your laptop.Now you’ll need to find the Voltage Output Unit on the back of your Power Adaptor where everything is written on the sticker. Normally it’s like “19V 4.7A”.
 Now take your Multimeter and put the red and black wire into their suitable socket, what you can also find the instructions in the Multimeter’s manual book.
Now set your Multimeter to the “Direct Current Voltage” testing mode and make sure you set the multimeter’s knob directs to the 20v.
Now you’ll need to put the red tip inside the adapter jack and the other black one to the outside edge of the adapter jack and while doing that, make sure you don’t touch both of them together.
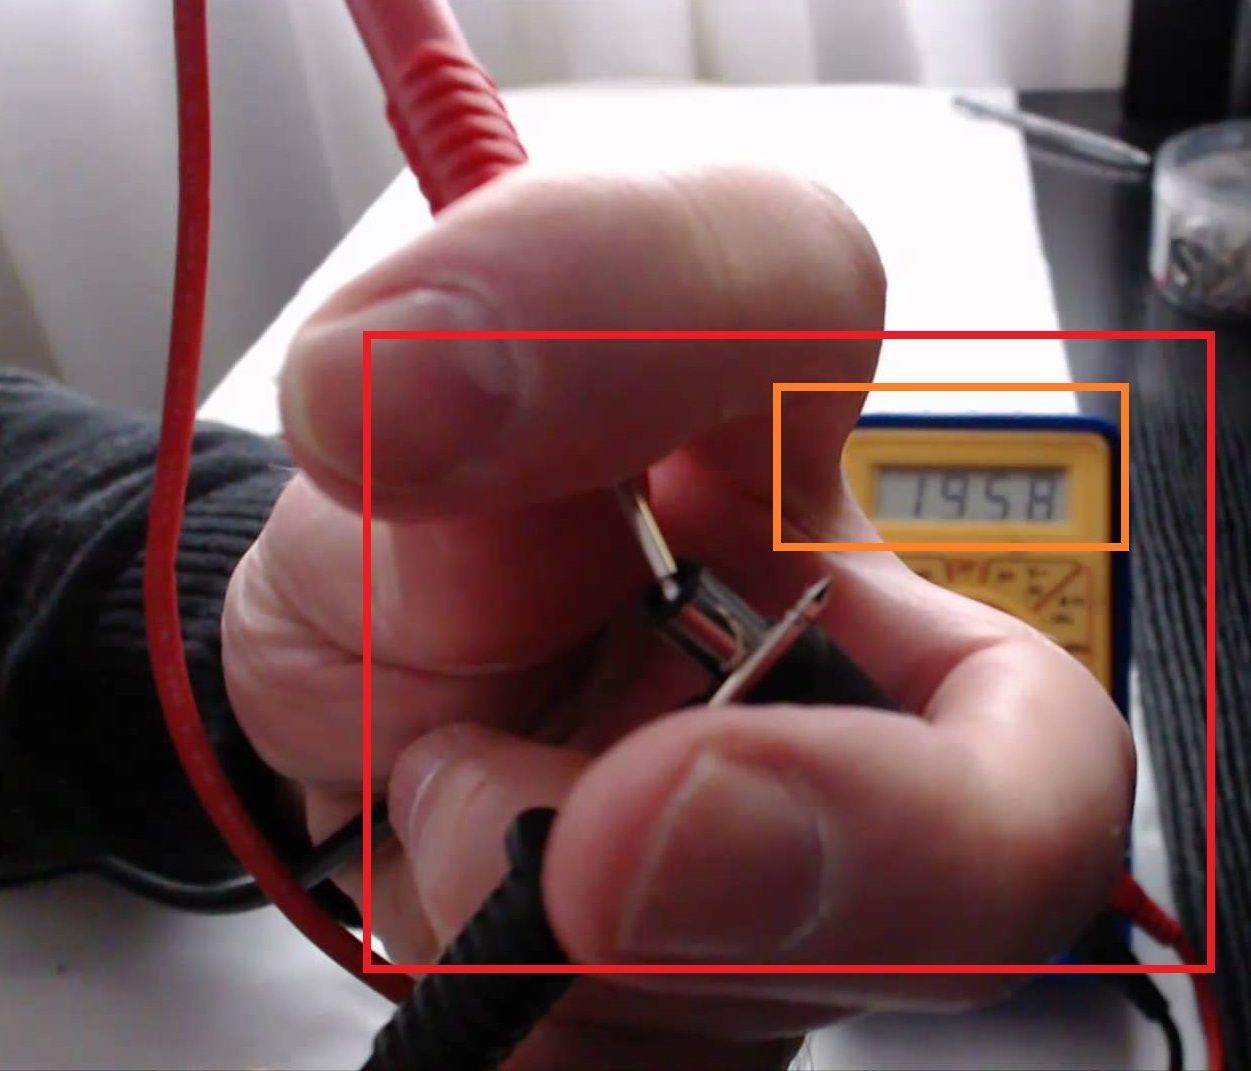 Now check your Multimeter’s display to see the coming output voltage from your power adaptor. If the output voltage is nearly same what’s printed on the back of the adaptor then it means your charger is working great and now you should need to move to next step, and if it’s not showing the correct output voltage then it’s really the time to purchase a new one.
- Step 2 – Battery Checkup: To identify, does your laptop’s battery is the one who’s creating this problem then the only thing what I can suggest you, is to calibrate your laptop’s battery manually.If the calibration won’t works for you, then you can try to run your laptop without using the battery by just connecting only with the power adapter and if your laptop’s run smoothly then it means your adapter is working great and now you’ll need to replace the battery.But before replacing your battery, you should need to reinstall your operating system first, because sometimes our windows got corrupted really bad that nothing can help.
#Last Possibility
At last, if you can’t find anything useful yet or does anything like changing adapter or battery can’t solve your problem either, then it’s definitely possible that your laptop’s internal motherboard got damaged, because sometimes when the motherboard’s charging chip got blown up then it’s 100% possible that you having this problem and in that case, I’ll highly suggest you to get repair your laptop motherboard by some professional knowledgeable engineer, and don’t try to do anything by yourself.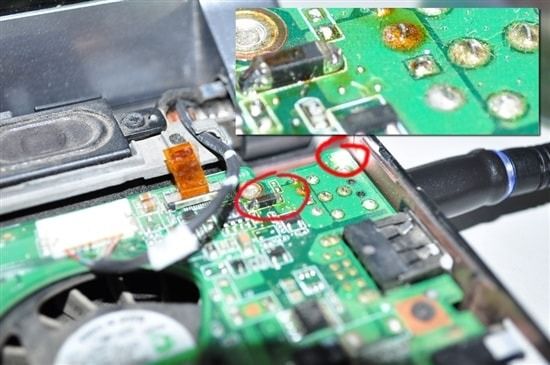
Smart Creative : How To Fix Laptop’S “Plugged In Not Charging” Problem? >>>>> Download Now
ReplyDelete>>>>> Download Full
Smart Creative : How To Fix Laptop’S “Plugged In Not Charging” Problem? >>>>> Download LINK
>>>>> Download Now
Smart Creative : How To Fix Laptop’S “Plugged In Not Charging” Problem? >>>>> Download Full
>>>>> Download LINK e8